1. Preface
As a heavyweight in the field of Vibe Coding, Anthropic, the parent company of Claude large models, has become popular all over the world since the launch of Claude Code. However, because it is mixed with some political purposes, users in China cannot use it directly. In addition, the official command line program form of Claude Code is relatively complicated, which to a certain extent restricts many domestic developers from understanding it. Even so, this does not prevent it from becoming a top player in the Vibe Coding circuit. Therefore, through the idea of eliminating complexity and simplifying, this article hopes to help developers quickly get started with Claude Code, and have the opportunity to use its auxiliary programming in depth in daily development, and jointly find new programming models in the future under the wave of the AI era.
2. Preparation
The following tutorial is based on MacOS. Please refer to the official documentation for Windows and Linux.
2.1 Install Node.js
Official website reference: https://nodejs.org/en/download
Version requirements: Node.js 18+
1 | # Download and install nvm: |
2.2 Install ClaudeCode
Official website reference: https://claude.com/product/claude-code
1 | npm install -g @anthropic-ai/claude-code |
2.3 Configuration and Startup
Notes: Since ClaudeCode is officially prohibited from use in China (including Hong Kong, Macao and Taiwan), be sure to use a legal regional global proxy before starting Claude to avoid being banned. Remember!
Since ClaudeCode (hereinafter referred to as CC) official Anthropic provides two usage methods (for account details, see ClaudeCode Series (1): Comparison of paid plans):
Method 1: Use Claude paid account
1 | # Enter the code project directory where you want to use ClaudeCode for AI auxiliary programming |
Method 2: Using the Anthropic API
1 | # Enter the code project directory where you want to use ClaudeCode for AI auxiliary programming |
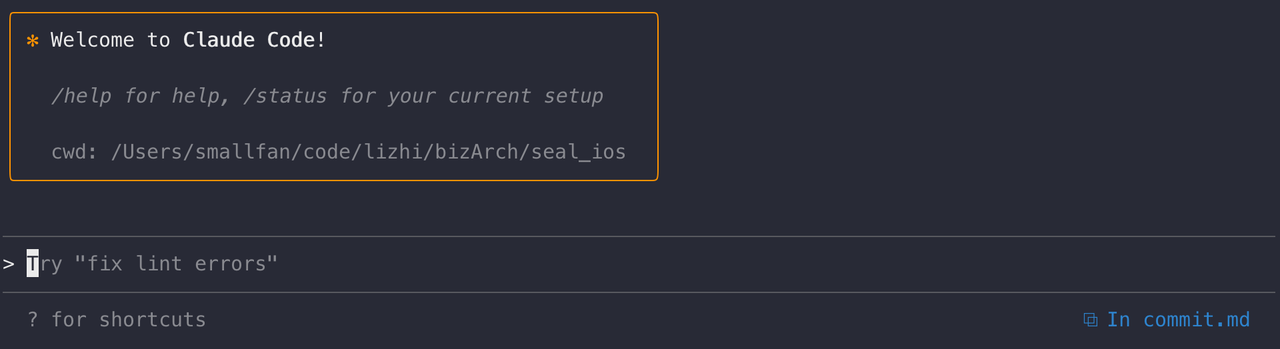
After completing the above configuration and starting it, you will enter the CC usage interface.
3. Important commands quickly
In the CC dialog box, enter the / characters to enter the command mode. CC has multiple built-in commands to help us use it better. Several of the key commands are introduced below.
For more information, please refer to the official documentation: https://docs.claude.com/zh-CN/home
3.1 init
Introduction
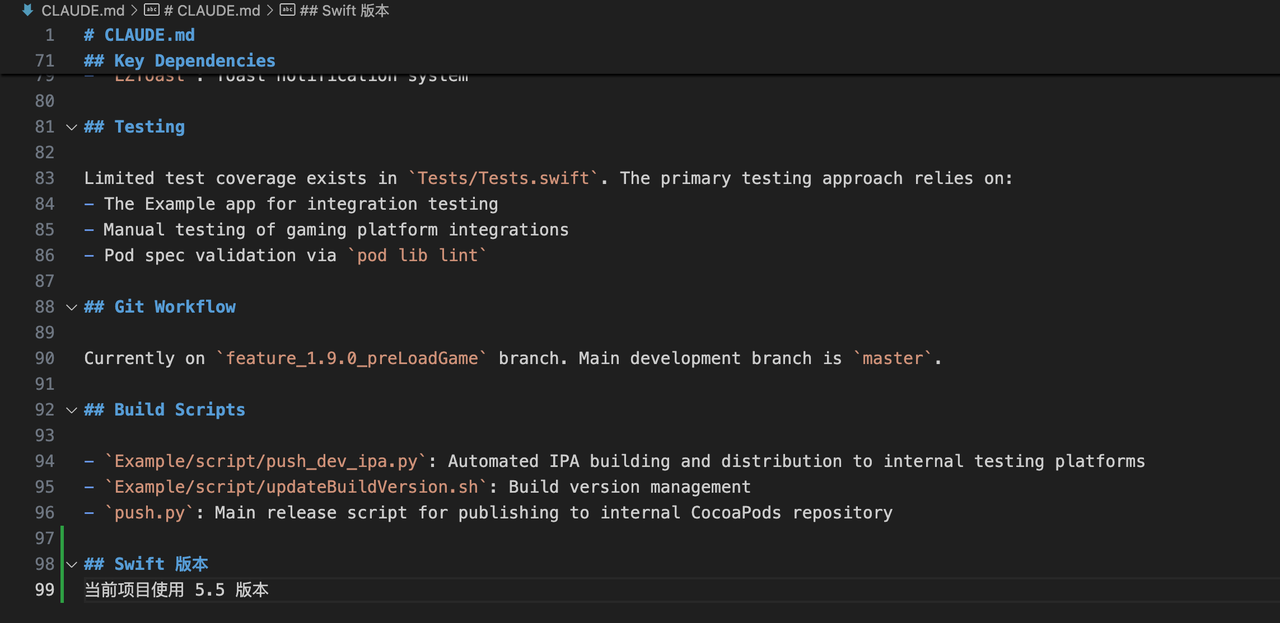
After entering the project directory for the first time, use the init command to let CC read through all the files in the entire directory and save the learned knowledge about the project to theCLAUDE.mdfile (similar to Cursor Rule). All subsequent conversations with CC will bring this file as context. This file helps AI understand the entire project faster.
At the same time, CLAUDE.md also supports adding custom content, such as:
3.2 compact
Introduction
During multiple rounds of conversations with CC, you can use the/compactcommand to compress the context of the conversation. After executing this command, CC will exclude some irrelevant content of the previous conversation, which can effectively improve the AI's concentration and significantly reduce Token consumption; more importantly, the Claude large model currently limits the context length to 256k. Even if the command is not executed manually, CC will be automatically triggered in a critical state. It is recommended to execute it manually in time at the end of a conversation.
The following is a usage technique. You can add prompt after the compact command to tell CC to perform compression as you expect, for example:
1 | /compact mainly retains the design content related to the retry process of loading game-related request tokens |
3.3 clear
Introduction
Whenever you want to start a new task, you should use the/clearcommand to clear the conversation record and maintain a clean context, which helps the AI to focus more on performing new tasks.
3.4 Think mode
Introduction
Claude model provides four different intensity thinking modes, namely:think<think hard<think harder<ultrathink, correspondingly the number of tokens of different magnitudes will be consumed. Before starting some more difficult reasoning tasks, you can add these thinking prompt words to increase the length of AI's thinking.
1 | ultrathink helped me analyze the architecture design of the current project in detail and output it into a UML file |
3.5 Plan mode
Introduction
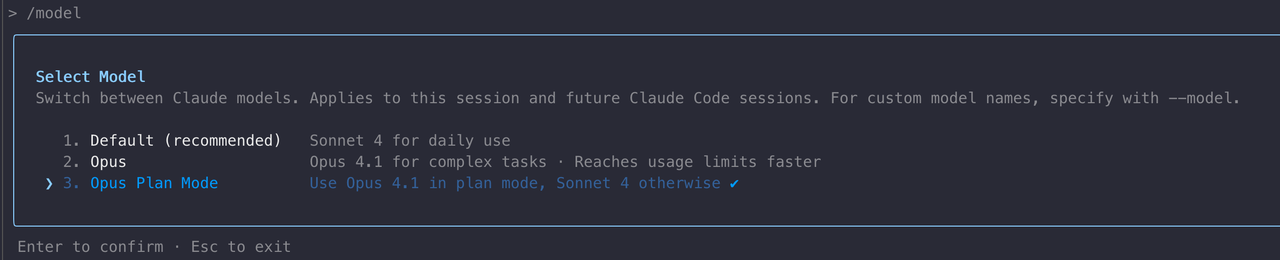
In the conversation state, press the shortcut keyshift + tabtwice in succession to enter the plan mode. In plan mode, CC will not modify any files or content. This mode is very suitable for full communication with CC in the early stages of a task. The Opus model itself is very suitable for architecture design and code understanding, but the number of tokens it consumes is 5 times that of Sonnet. Therefore, it is officially recommended to use the Opus model in plan mode and the Sonnet model in edit mode, and this option is preset under the/modelcommand.

3.6 Temporary command line mode
Introduction
Enter the!characters in the dialog box, which switches to the command line mode, so that you can execute some temporary command line commands without opening an additional window. There is an advantage to using this mode: the process and results of command execution will be added to the CC dialogue context. The AI can see the entire command execution process from the dialogue history, preventing the AI from performing some repeated operations.
1 | ! pod install --repo-update |
3.7 Fast memory mode
Introduction
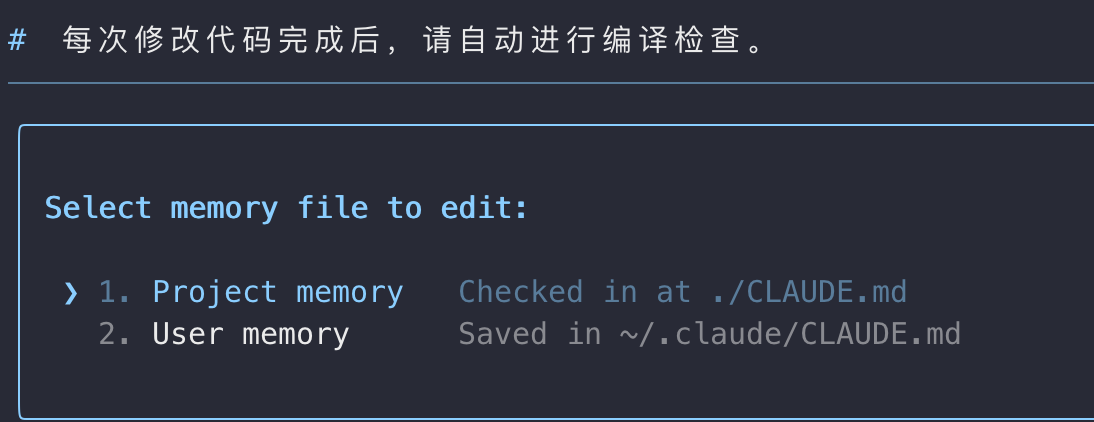
Enter#in the dialog box, which switches to the fast memory mode. The content entered next is recorded by CC as a file and becomes the long-term memory of the AI. There are two types of memory storage locations:
- Project memory: It is project-level memory. The content is saved to the
CLAUDE.mdfile in the current directory and is only effective for the current project.- User memory: It is user-level memory. The content is saved in the
CLAUDE.mdfile in the user directory and takes effect for all global projects.
3.8 IDE linkage
Introduction
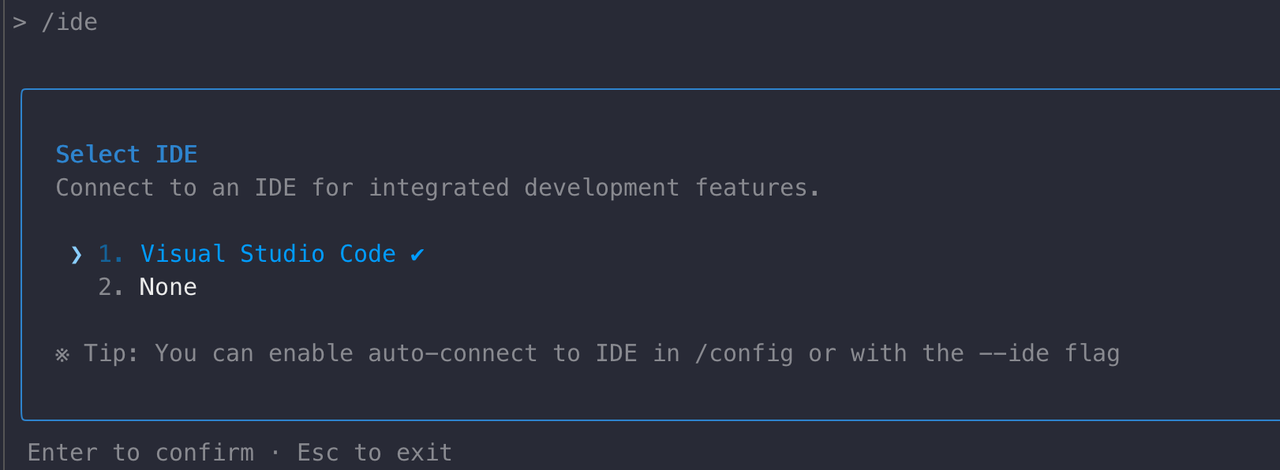
If you use an IDE supported by CC (such as VSCode, Android Studio) and open the current project directory, use the/idecommand to start the linkage function. Before using this command, the corresponding IDE needs to install the Claude Code plug-in.
Take VSCode as an example to introduce the usage process of Claude Code plug-in:
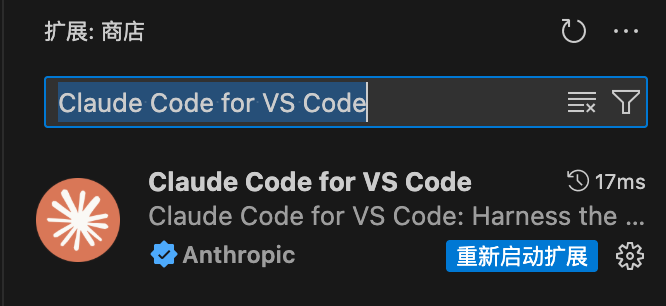
First step: Search for Claude Code for VS Code in the extension and complete the installation.
Second step: Use the ide command to select the corresponding IDE.
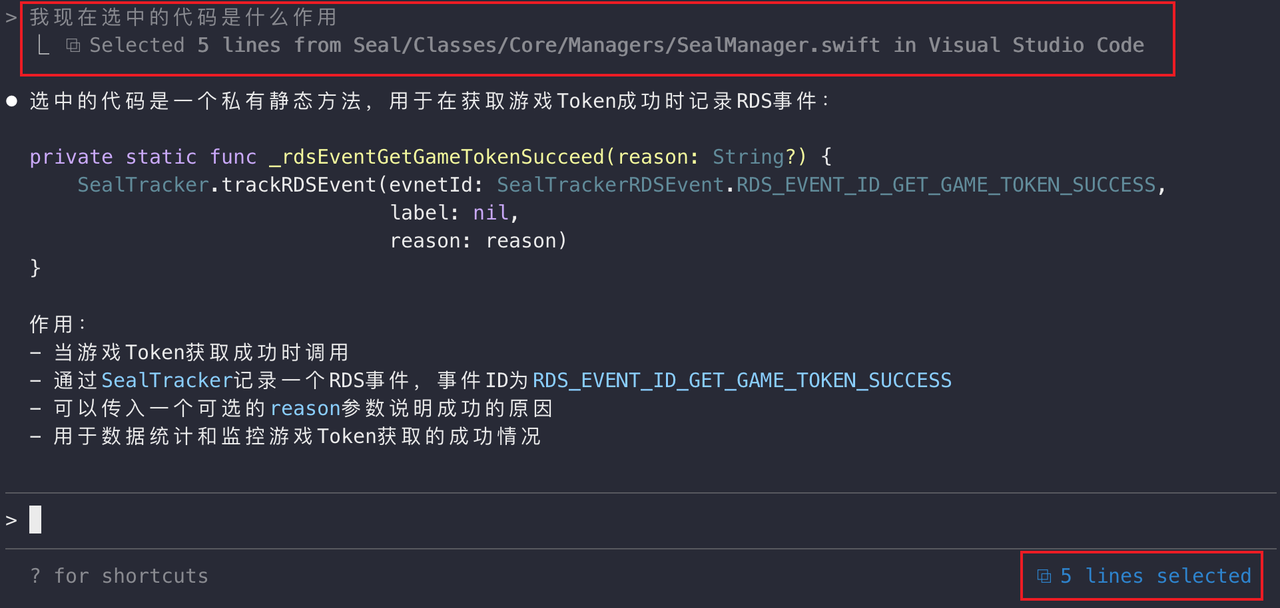
The following are the two functions of Claude Code linking with VSCode:
Feature 1: Code selection recognition
The code selected by the cursor in VSCode can be quickly read by CC.

Feature 2: AI code modification diff visualization
When CC modifies the code, VSCode will open a new window to compare before and after the modification (similar to git diff). After the manual comparison is passed, the actual code modification operation will be confirmed and performed.
4. MCP
The principles and value of MCP will not be introduced in this article.
4.1 Install MCP
Here, take the installation of Context7 as an example. First, obtain the MCP related parameter description from the official website:
1 | { |
Claude Code is as follows:
Call remote service
1 | claude mcp add --transport http context7 https://mcp.context7.com/mcp --header "CONTEXT7_API_KEY: YOUR_API_KEY" |
Call local service
1 | claude mcp add context7 -- npx -y @upstash/context7-mcp --api-key YOUR_API_KEY |
The above installation method is project level. If you want it to be user level, add the --scope user parameter accordingly:
1 | claude mcp add context7 --scope user -- npx -y @upstash/context7-mcp --api-key YOUR_API_KEY |
After completing the above steps, use the mcp command to view all mcp services currently installed and running.
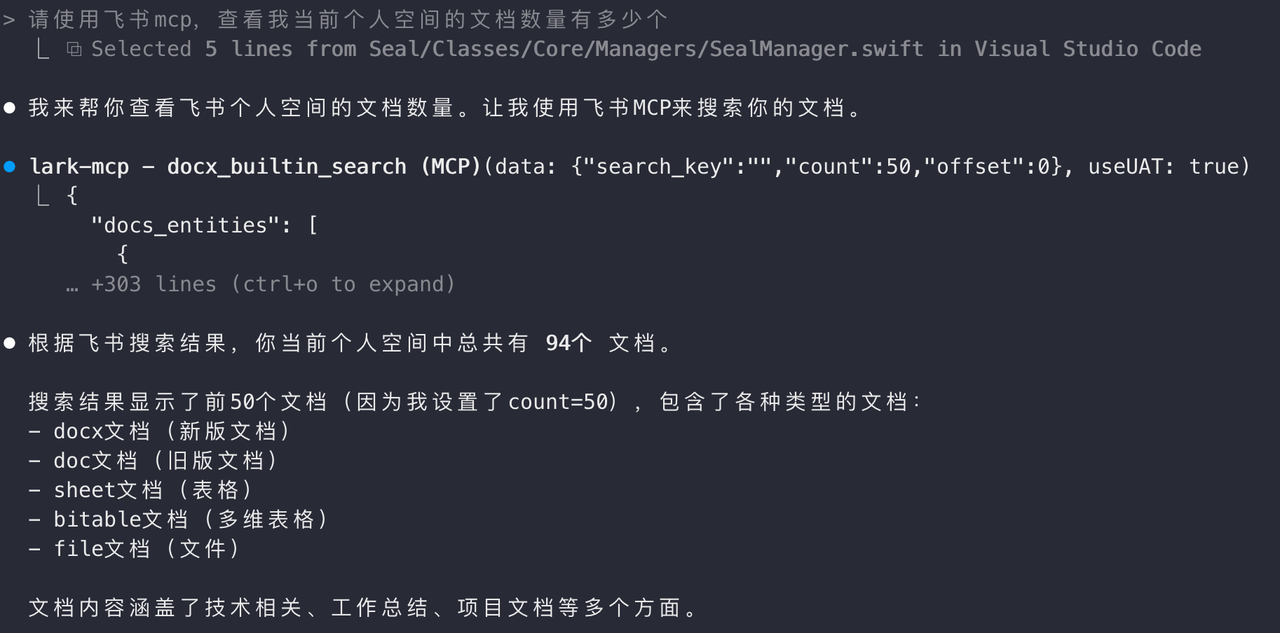
4.2 Using MCP
In the CC dialog box, directly specify the MCP you want to use.
4.3 Uninstall MCP
1 | claude mcp remove context7 |
5. Permission management
Introduction
Due to security requirements, CC will suspend the current operation and request user consent every time it accesses a directory or file, modifies a file, submits a git operation, accesses MCP, etc., which increases the complexity of use to a certain extent. Therefore, CC provides the/permissionscommand, allowing users to customize rules to specify which operations are allowed to be performed directly by CC and which operations are prohibited from being executed by CC.
- There is also a method that is not recommended (yolo mode): when starting CC, append the
--dangerously-skip-permissionsparameter to give CC the highest permissions. No need to apply for permissions for any operation. The complete command is as follows:claude --dangerously-skip-permissions
5.1 Allow
As the name suggests, it is a list of rules that allow CC to operate directly. Add the following rules:
1 | # Bash command is used to perform the bash operation |
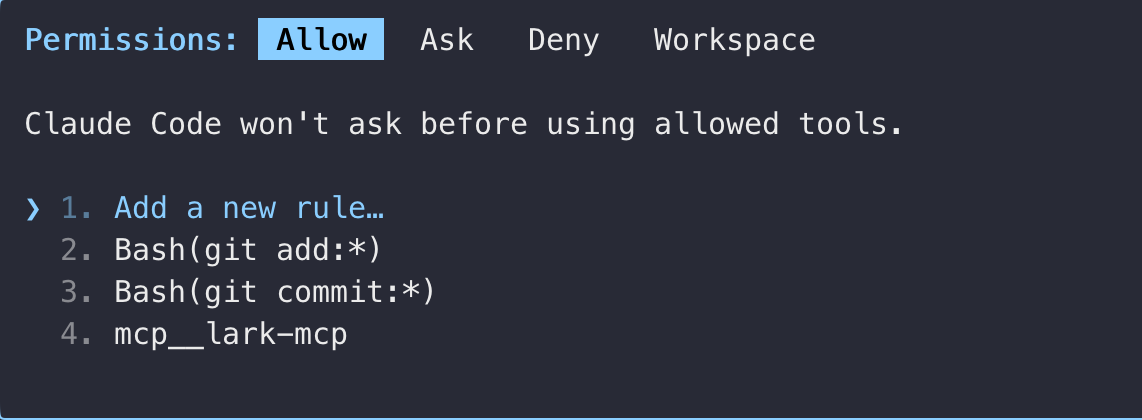
5.2 Ask
If you want to ask whether you agree to a command before each execution, you can add it to the Ask list, and the adding format is the same as Allow.
5.3 Deny
If you do not want the command to be executed by CC, you can add it in the Deny list. The adding format is the same as Allow.
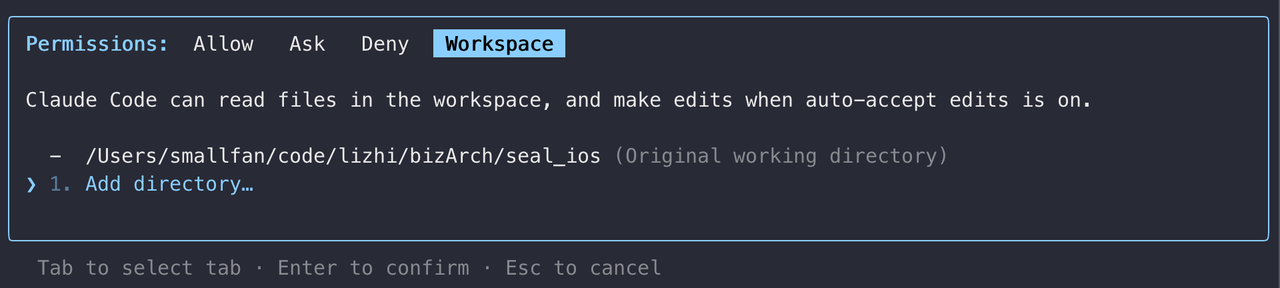
5.4 Workspace
When you want CC to automatically modify the code directly to the corresponding project without authorization after generating the code, you can add the project directory address in the Workspace.
6. Commands
Introduction
In addition to the many powerful built-in commands introduced earlier, CC also supports user-defined commands, which can be quickly called with/characters. Custom commands also support project level and user level.
- User level command location:
~/.claude/commands/- Project level command location:
.claude/commands/
Create 2 custom commands commit and cr, which are used to let AI analyze the contents of the staging area and write a standard message to complete git submission and diff the current branch and execute code review:

6.1 Example 1
1 | # commit.md |

6.2 Example 2
1 | # cr.md |

7. Hooks
Introduction
Hook allows CC to perform certain operations at a specific node in the work process. Hook also supports project level and user level. Use the/hookcommand to perform the corresponding configuration.
- User level Hook configuration file location:
.claude/settings.json- Project level Hook configuration file location:
~/.claude/settings.jsonor~/.claude/settings.local.json(higher priority)
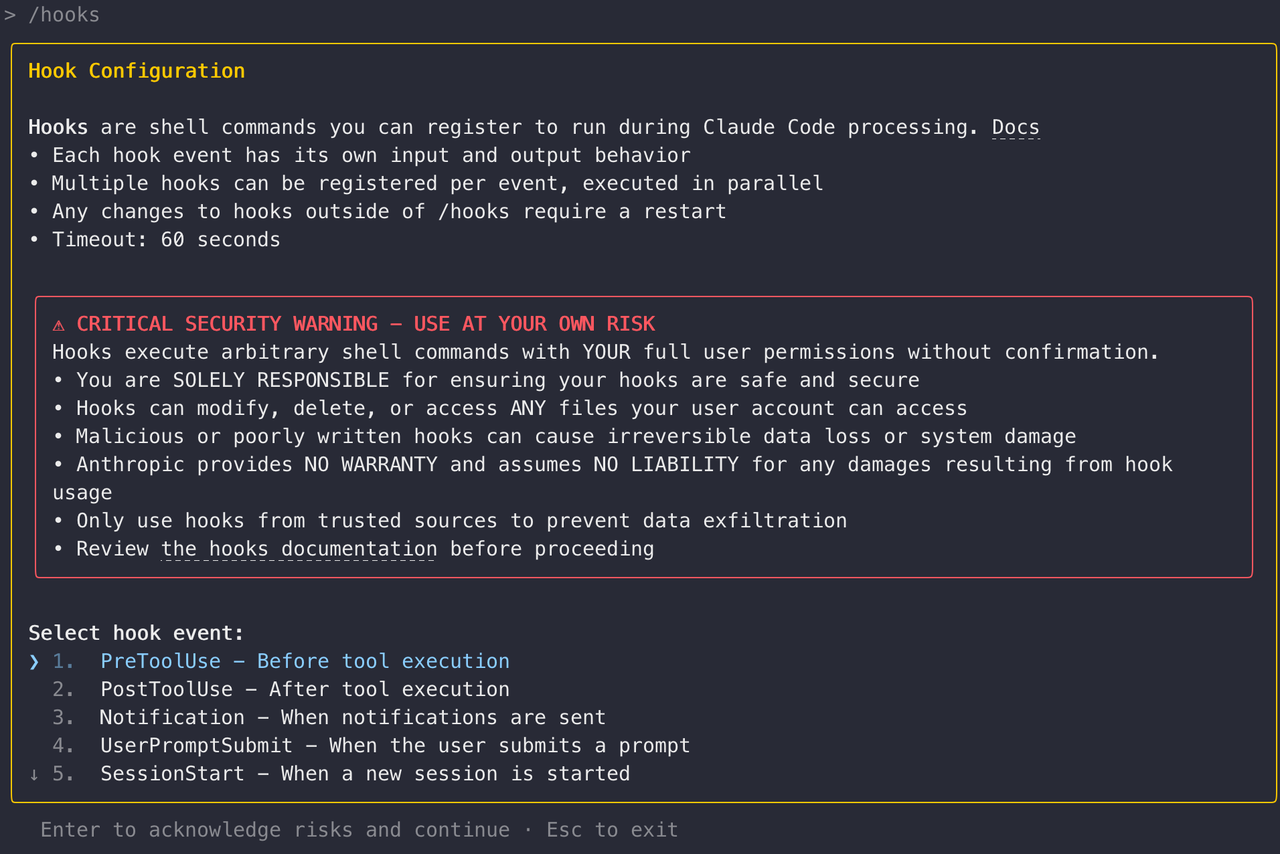
Hook event description
- PreToolUse: Executed before the corresponding operation occurs, such as modifying the code.
git stash pushTemporarily stores all current changes. - PostToolUse: Executed after the corresponding operation occurs, such as after modifying the code
swiftformat .Check the code format of the modified content - Notification: Executed when the notification is sent, such as after CC feedback. The
compactcommand compresses the context. - UserPromptSubmit: Executed when the user submits the prompt word. For example, after submission, a custom command is executed to supplement the prompt word background with fixed content.
- SessionStart: Executed at the beginning of a new session. For example, after a new session is created, the preset custom prompt word content will be automatically filled in, etc.
Hook matcher description
- Read: Content reading
- Write|Edit|MultiEdit: Content modification
- WebFetch|WebSearch: Web content request
In addition, it also supports hook-installed mcp services, etc. For more gameplay reference: https://docs.claude.com/en/docs/claude-code/hooks#hook-execution-details
1 | { |
8. SubAgents
Introduction
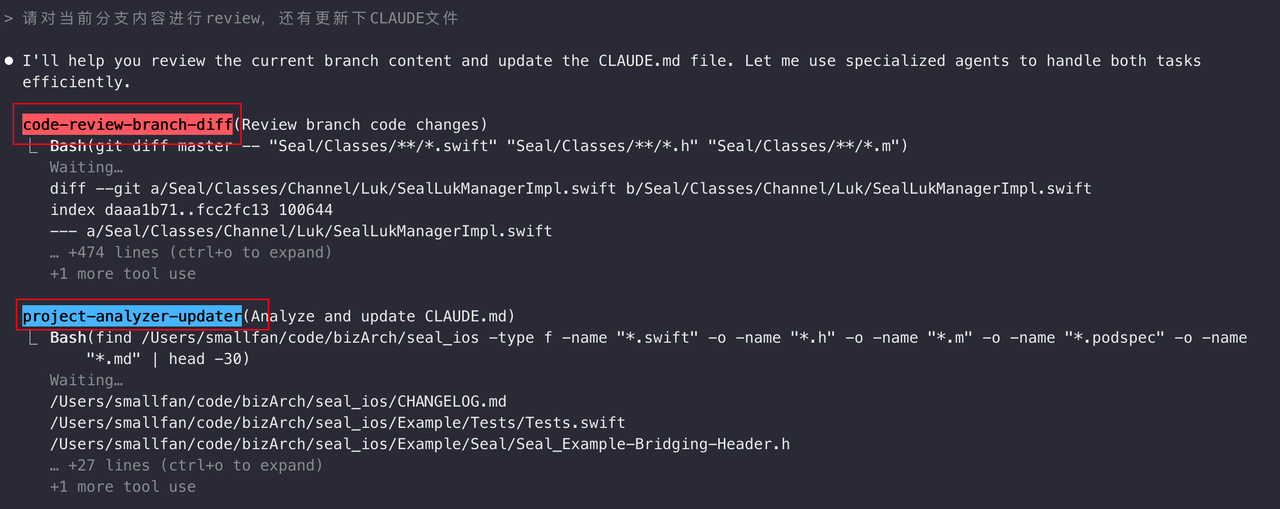
CC Use SubAgents to enable parallel execution of multiple subtasks in the background to speed up task execution efficiency. Each Sub Agent focuses on a small feature that improves the predictability of results. Proper use of SubAgents to break down complex tasks can improve the success rate of the task. Use the/agentscommand to create it quickly. SubAgents also supports project level and user level.
- User level command location:
~/.claude/agents/- Project level command location:
.claude/agents/
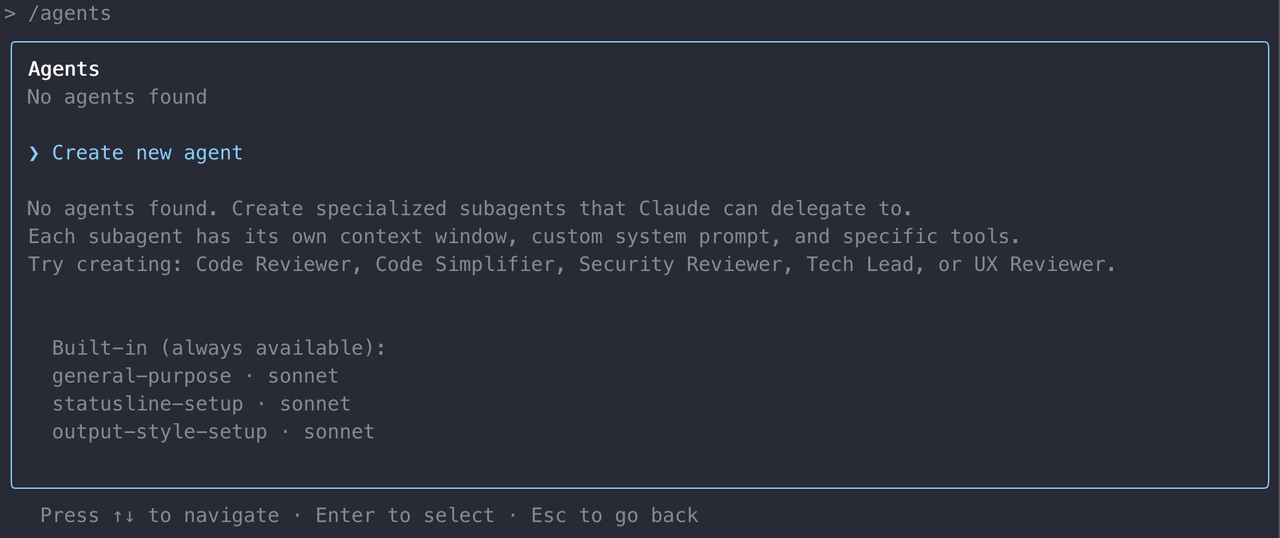
8.1 Example
Create Agent 1

Create Agent 2

Prompt word call
9. Historical dialogue management
Introduction
CC supports restoring to specified historical conversations. The existing management methods are mainly divided into 3 types, namely:
/resumecommandccundoClaudia
9.1 Resume command
Directly enter the /resume command in the dialog box to enter the historical topic selection. After selecting the corresponding historical topic, double-click the Esc key twice to jump to a specific message for dialogue.
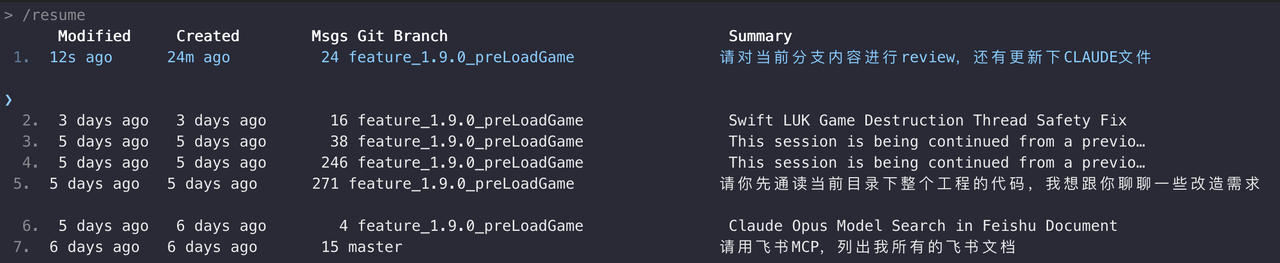
Attention: /resume command only supports rolling back the conversation content, but does not support rolling back codes. If you need a rollback code, please refer to ccundo.
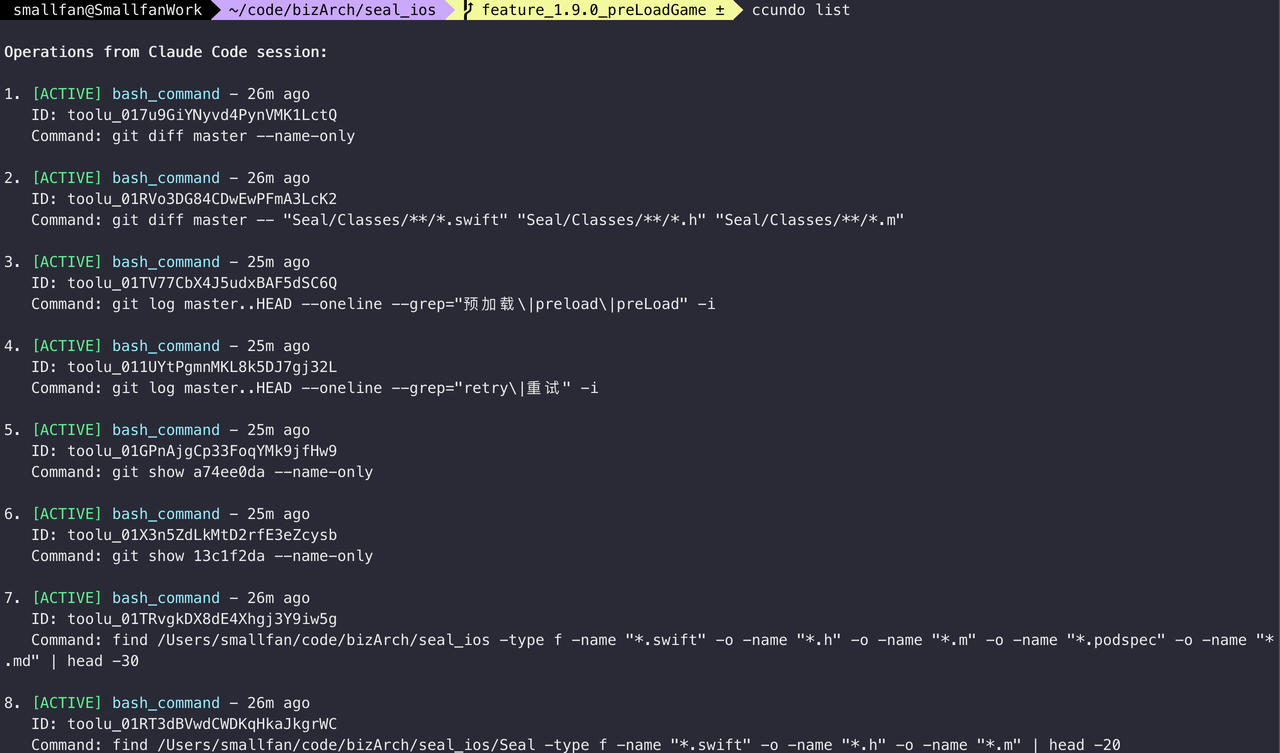
9.2 ccundo
If you need to roll back the conversation content and code at the same time, you can use the solution of the open source project ccundo [Github link].
9.3 Claudia
Considering that many people lack experience (fear) with the command line, I also found a CC session management tool Claudia [Github link] that provides a GUI interface. This tool needs to be compiled and burned by yourself. If you want to be lazy, you can download it from [here].
9.4 Export
Introduction
CC supports the use of the/exportcommand to export all current session content. The scenarios are used in the following scenarios:
- Save to file for continuing the task in other device environments
- Copied to other AI models for multi-model cross-validation
